

Eyelash lifting: made easy with andmetics
- By Lara Grimm
- Mar 9, 2022

When was the last time you used an eyelash curler? For many, it's probably been a while. Curved lashes instantly give you an open and fresh look - but using an eyelash curler is awkward. The results often don't last long and it can quickly become painful if the fine skin around the eyes is accidentally pinched. Our tip: a lash lift. The lashes are lastingly lifted - pain-free, long-lasting and with a attractive curl! Learn how now!
The Andmetics eyelash lift kit makes lash lifting easy and safe. It contains all the ingredients you need for a lash lift. For an even more intensive result, tint your lashes after the lift - we show you how in the tutorial.
What you need for lifting and tinting
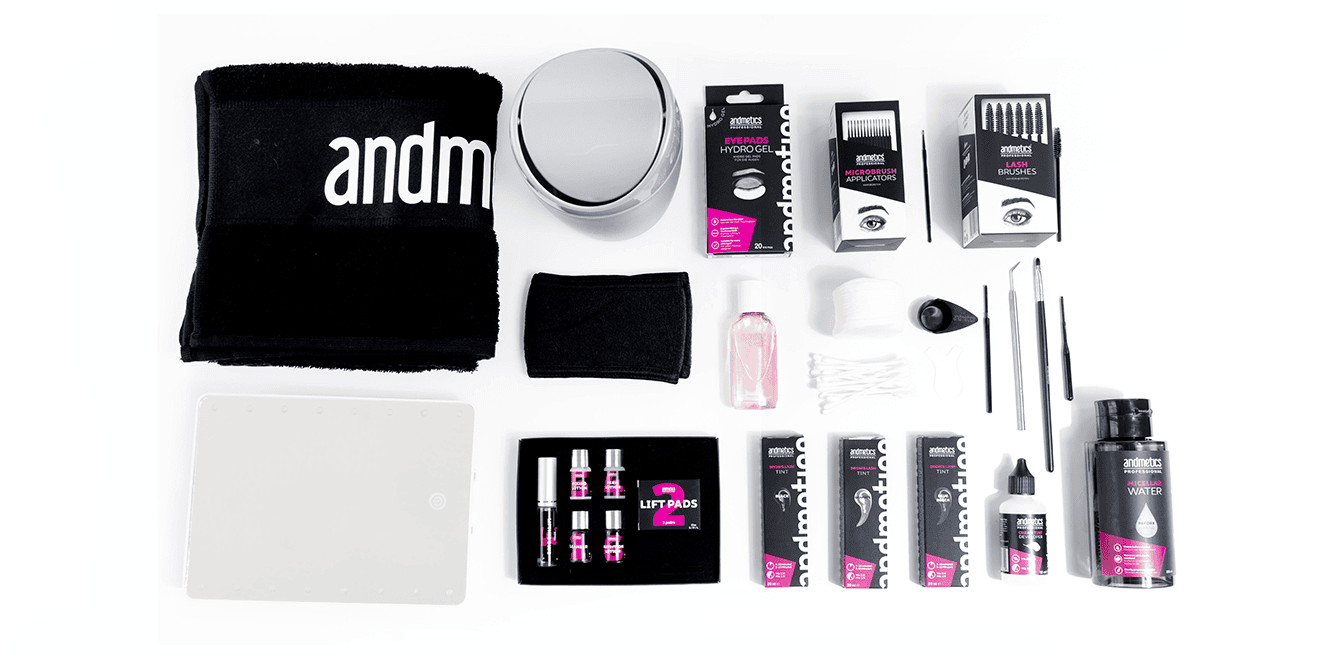
Lifting:
- Micellar Water (not included in the set)
- Hydro Gel Eye Pads
- Micro Brush
- Lifting Pads S / Lifting Pads M1 / Lifting Pas M2 / Lifting Pads M
- Lifting Tool
- Perm & Fixing Starter or Perm & Fixing Expert
Colouring:
- Dyeing cups (not included in the set)
- Colour developer creamy or Colour developer liquid (not included in the set)
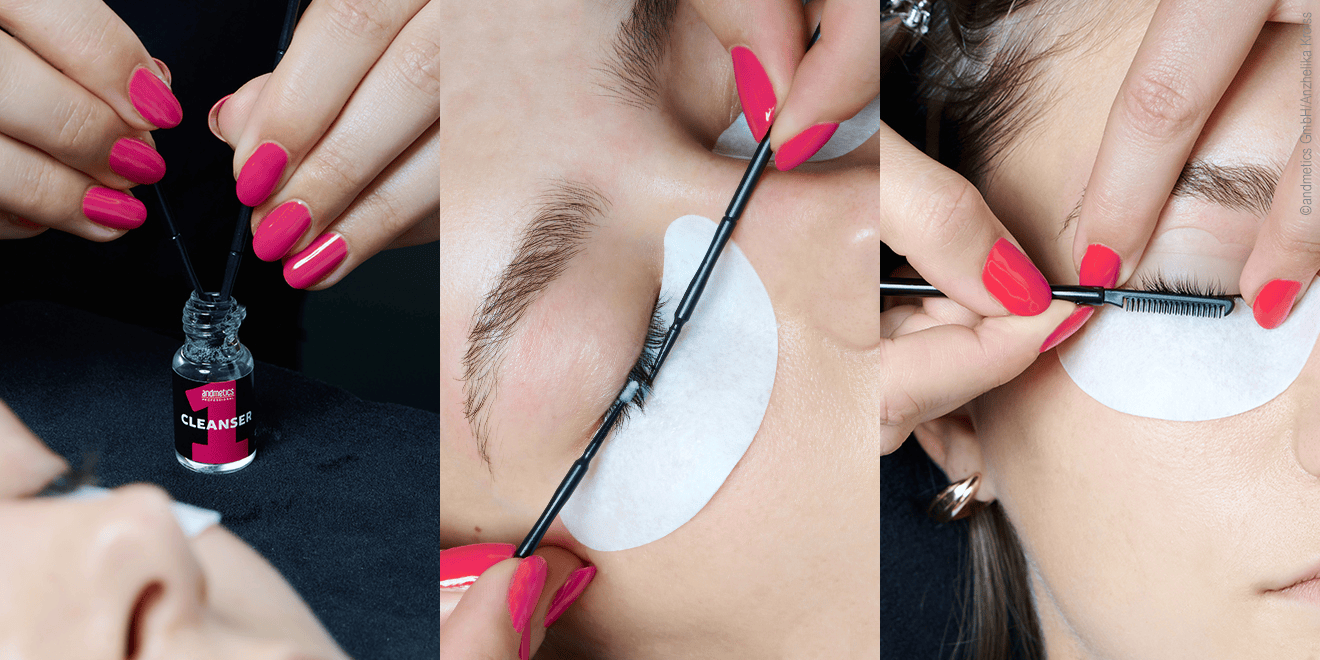
Before 1: Clean
Before starting the lash lift, thoroughly cleanse the lashes and skin with Micellar Water. Apply the Hydro Gel Eye Pads to the lashes of the lower lash line.
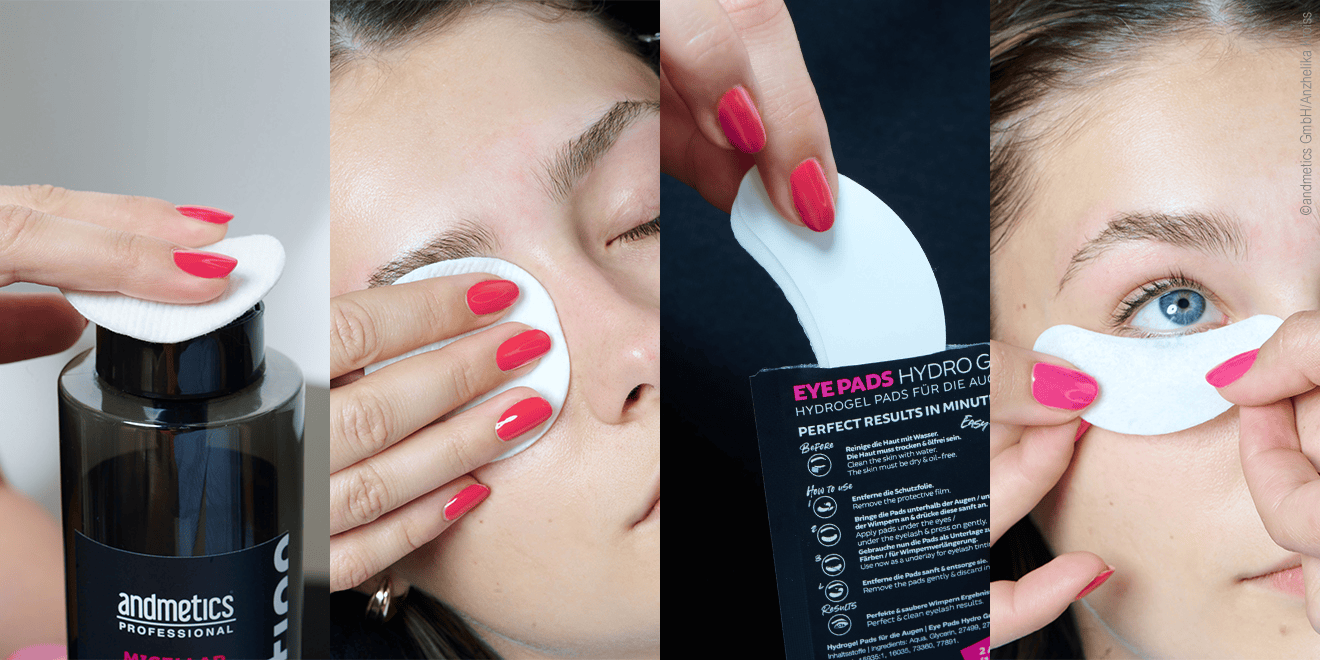
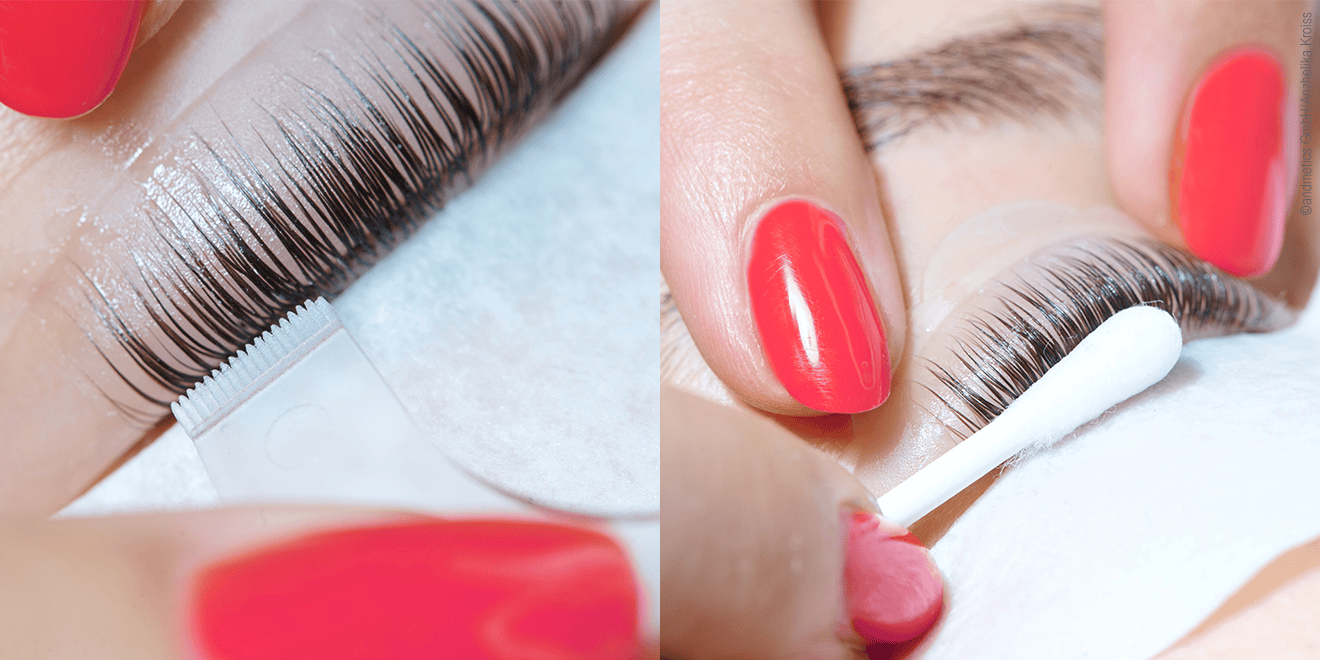
Before 2: Analyse eyelashes
Use the cleanser along with two microbrushes to degrease the hairs and let everything dry. Analyse the structure and length of the lashes. Select the appropriate shape and size of lifting pads. For pad size S | M1 | M2 | L, the lashes must cover three quarters of the curl. For size M, only half.
Step 1: Apply adhesive to the lifting pad
Apply the Lifting Glue to the padded lifting pads & wait about 30-45 sec for the glue to adhere. Apply the adhesive pads to the moving eyelids close to the lash line. Brush through the lashes to make sure they do not stick under the lifting pad.
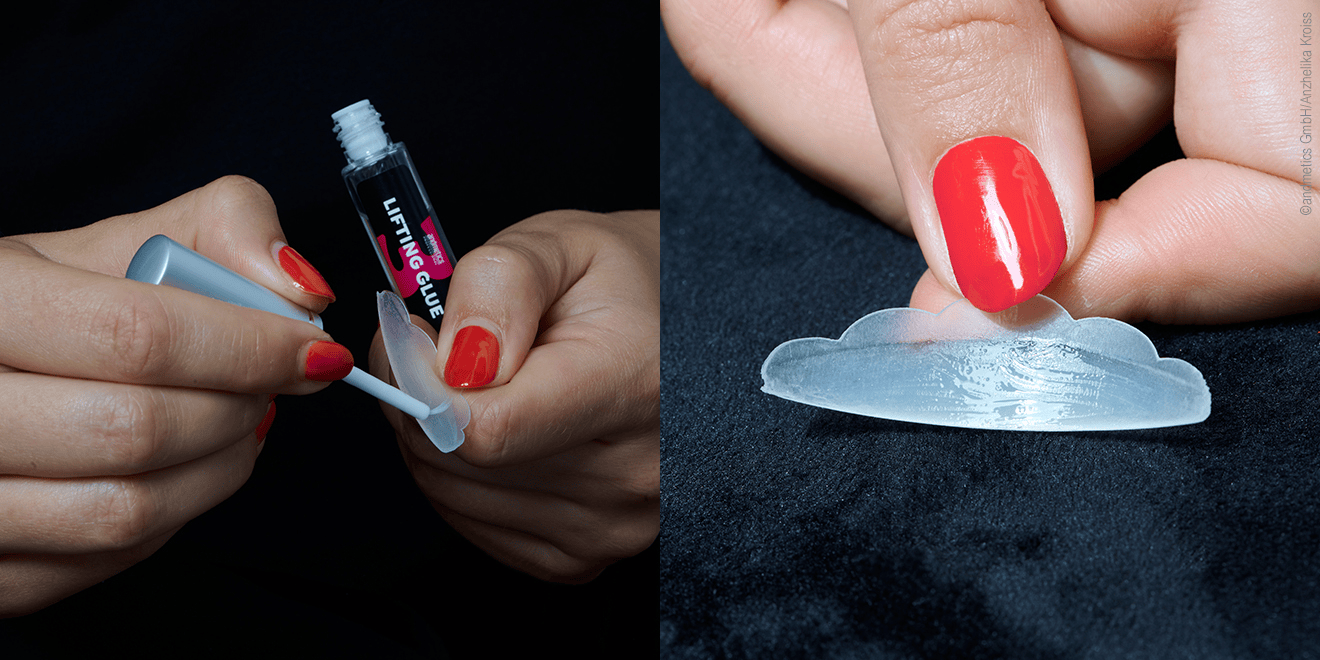
Step 2: Apply pad to lash line
Apply the Lifting Glue to the padded lifting pads and wait about 30-45 sec for the glue to adhere. Apply the adhesive pads to the moving eyelids close to the lash line. Brush through the lashes to make sure they don't stick under the lifting pad.
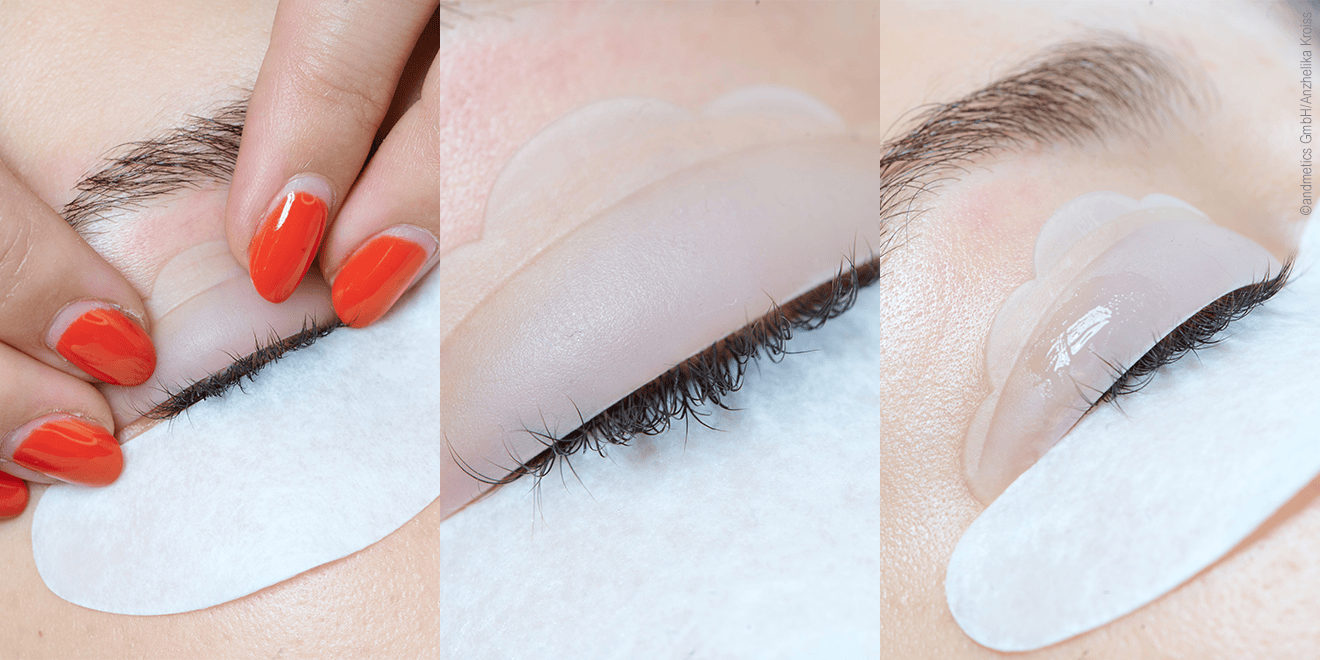
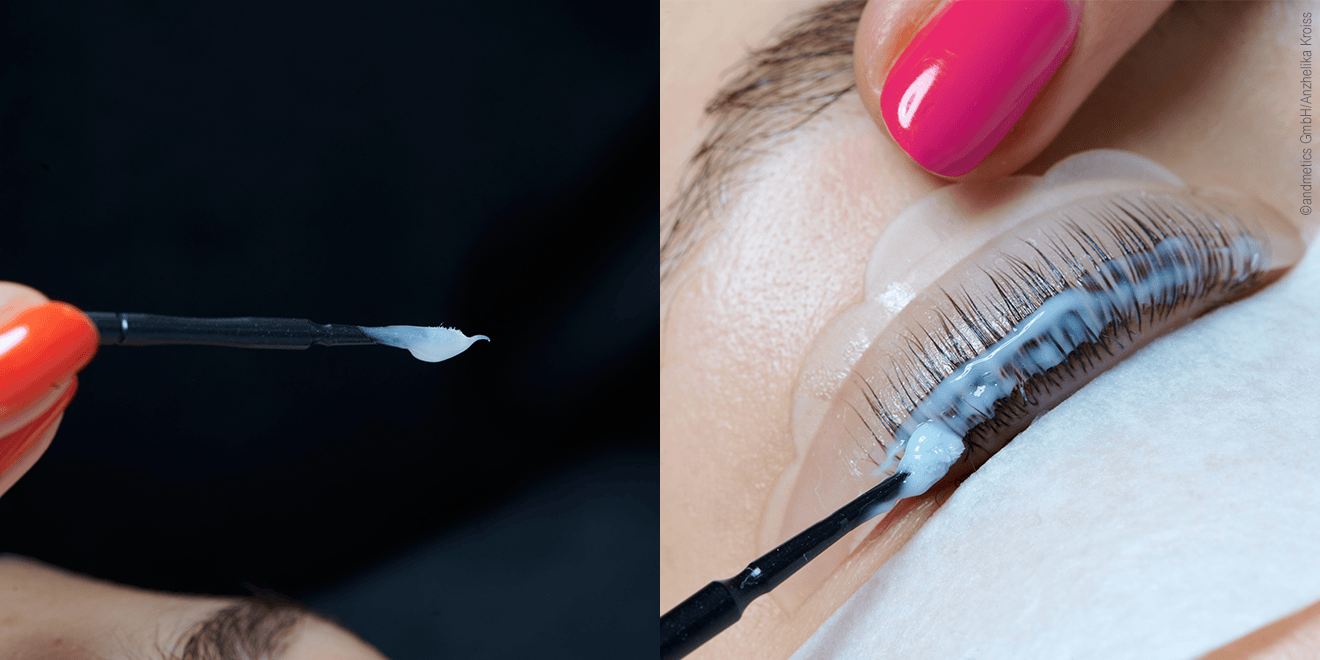
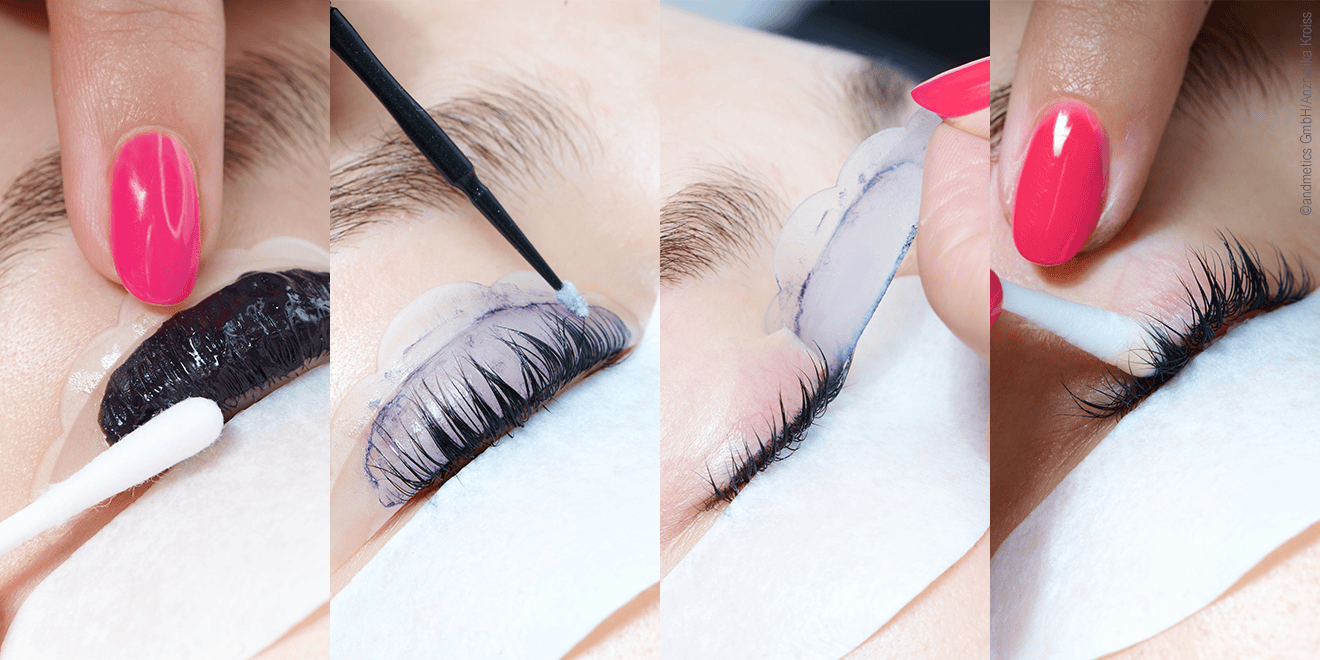
Step 3: Attach lashes to the lifting pad
Apply the Lifting Glue to the Lifting Pad one inch at a time and wait about 45 sec for the glue to adhere. Using a Lifting Tool, gradually bend the lashes onto the padded lifting pad.
The lashes must stick to the pad straight, separately from each other and stretched upwards. Otherwise, there is a risk that the lashes will come off during the treatment.
Step 4: Apply perm lotion
Carefully apply the perm lotion using the microbrush to the lashes from the base to the centre at most. Try to apply the lotion floating and without pressure. Pressure can cause individual lashes to detach from the lifting pad.
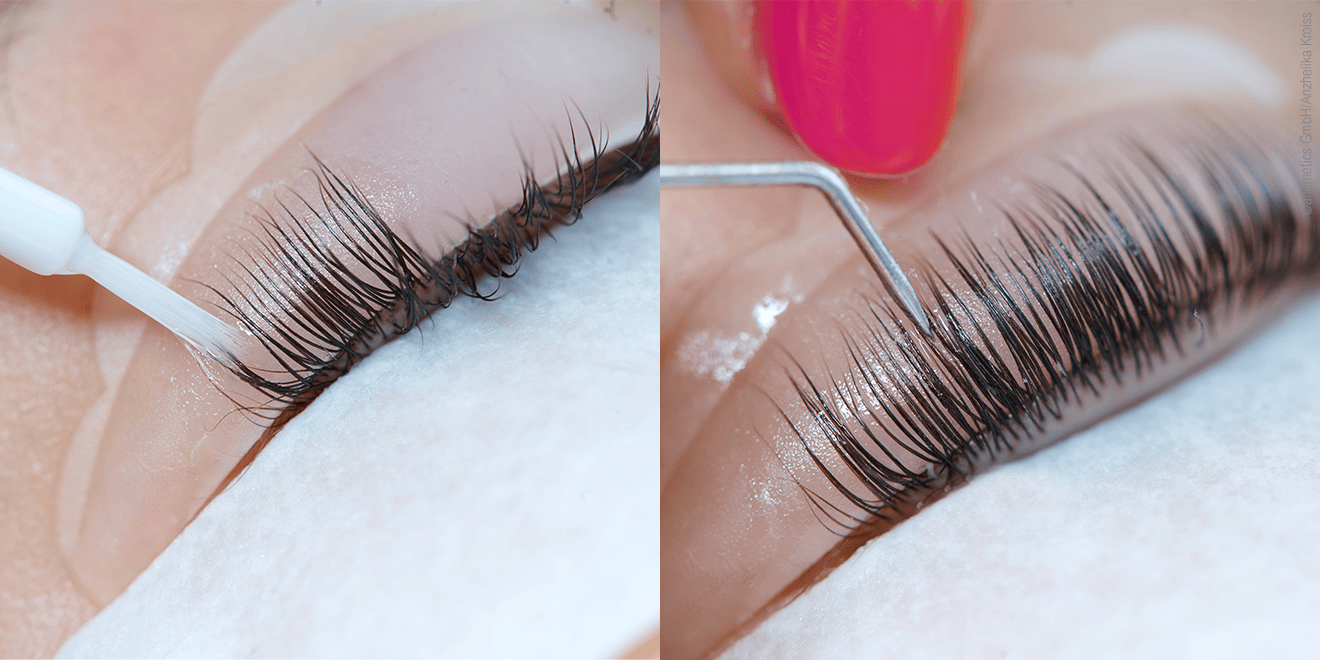
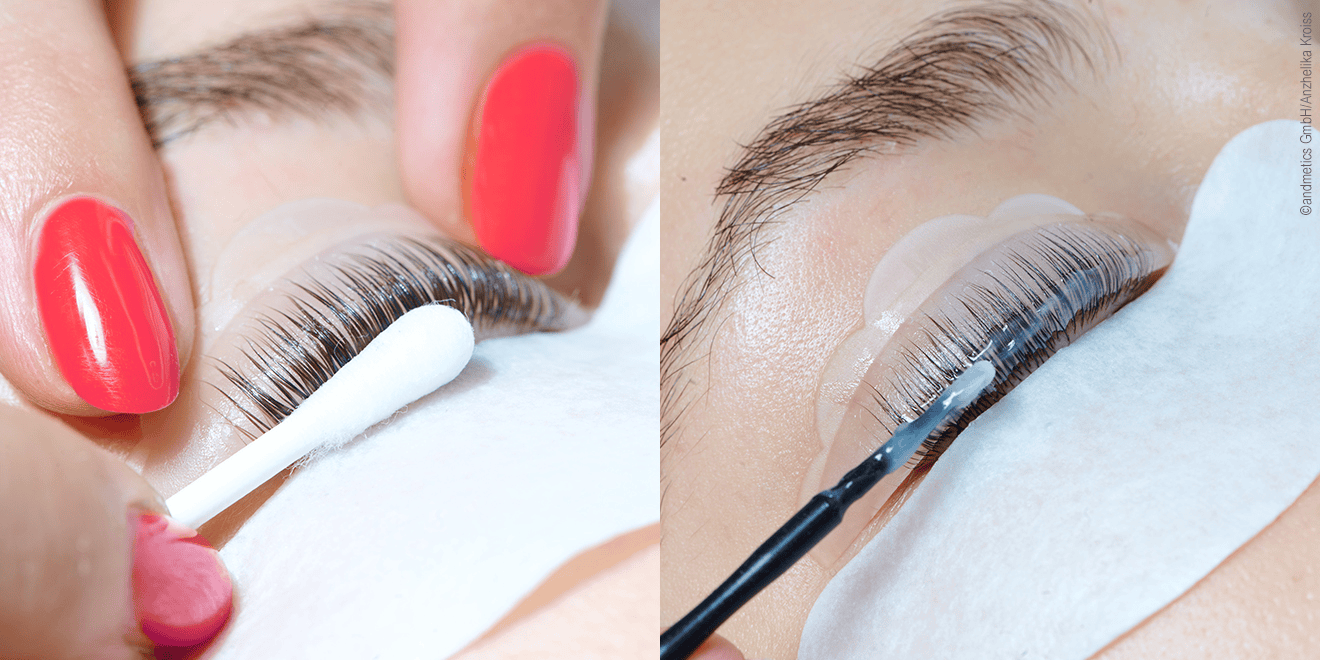
Step 5: Remove lotion
Remove the Perm Lotion with a dry cotton swab. Then, using the microbrush, carefully apply the fixing lotion to the lashes from the base to the centre at the most. Try to apply the lotion floating and without pressure. After the application time, remove the fixing lotion with a cotton swab.
Perm & Fixing Lotions: different application times
There are 2 different perm and fixing lotions
- Perm & Fixing Starter: normal application time
- Perm & Fixing Expert: extra fast application time
The application time depends on the type of lotion and the thickness of the eyebrow hairs:
Fine hairs
Starter: 7-8 minutes
Expert: 3-4 minutes
Normal hairs
Starter: 9-10 minutes
Expert: 5-6 minutes
Strong hairs / downward growing lashes
Starter: 10-12 minutes
Expert: 7-8 minutes
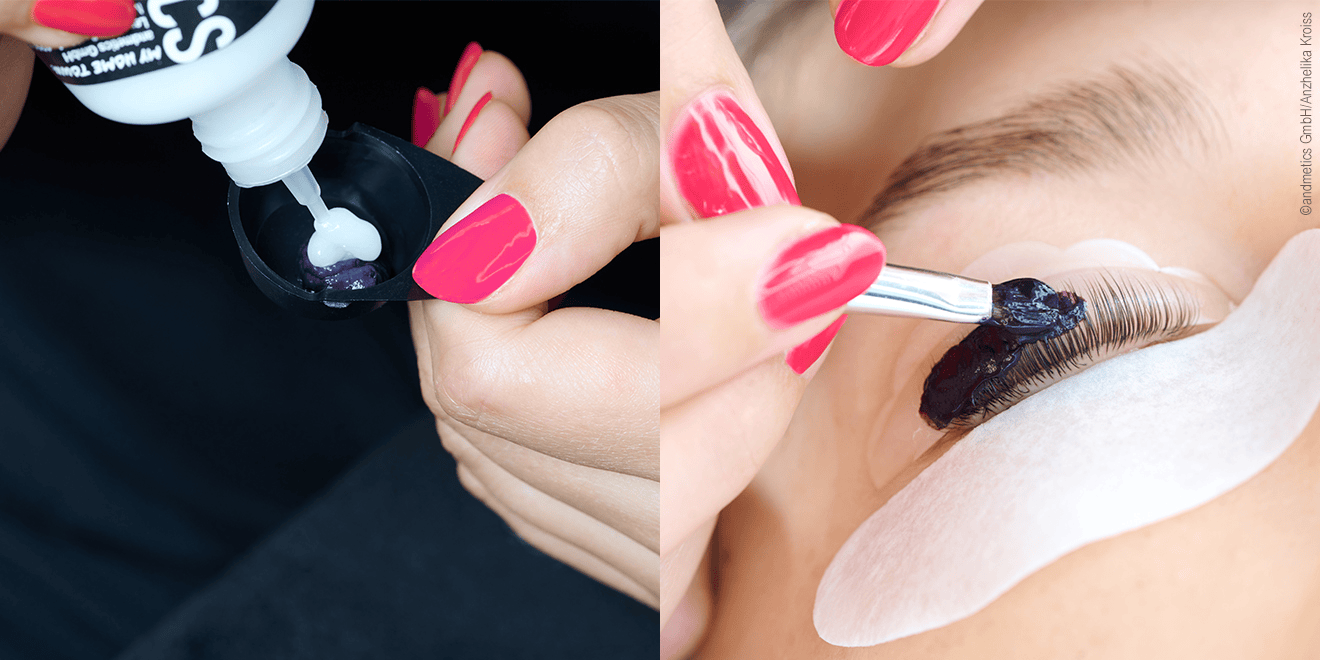
Step 6: Tint eyelashes
Choose an eyebrow and eyelash dye in a matching shade. Mix the dye in a 1:1 ratio with an andmetics colour developer in a dyeing cup.
There are 2 different colour developers:
- Colour developer creamy: for a slightly thicker, creamier colour blend.
- Colour developer liquid: for a thinner, more liquid colour mixture.
Cover lashes completely with colour from lash line to tips using the colour brush. The Lash Lifting treatment allows the hairs to take on the colour more quickly. The perfect time to apply the colour is 5-7 minutes
Step 7: Remove eyelash tint
First, carefully remove the eyelash tint with a dry cotton swab. Then you can clean it additionally with the Cleanser. Now, using the Nutrition Lotion, carefully separate the lashes from the padded lifting pads using the microbrush. Carefully remove them from the skin and dispose of them.
Step 8: After – here's how to get the perfect finish
Remove the Hydro Gel Pads from your eyelids and discard them. Shape the lashes with a lash brush. Check the result with your eyes open. For a perfect result, do not allow the freshly lifted lashes to come into contact with any liquids such as water, toner or make-up remover for 24 hours after the treatment.
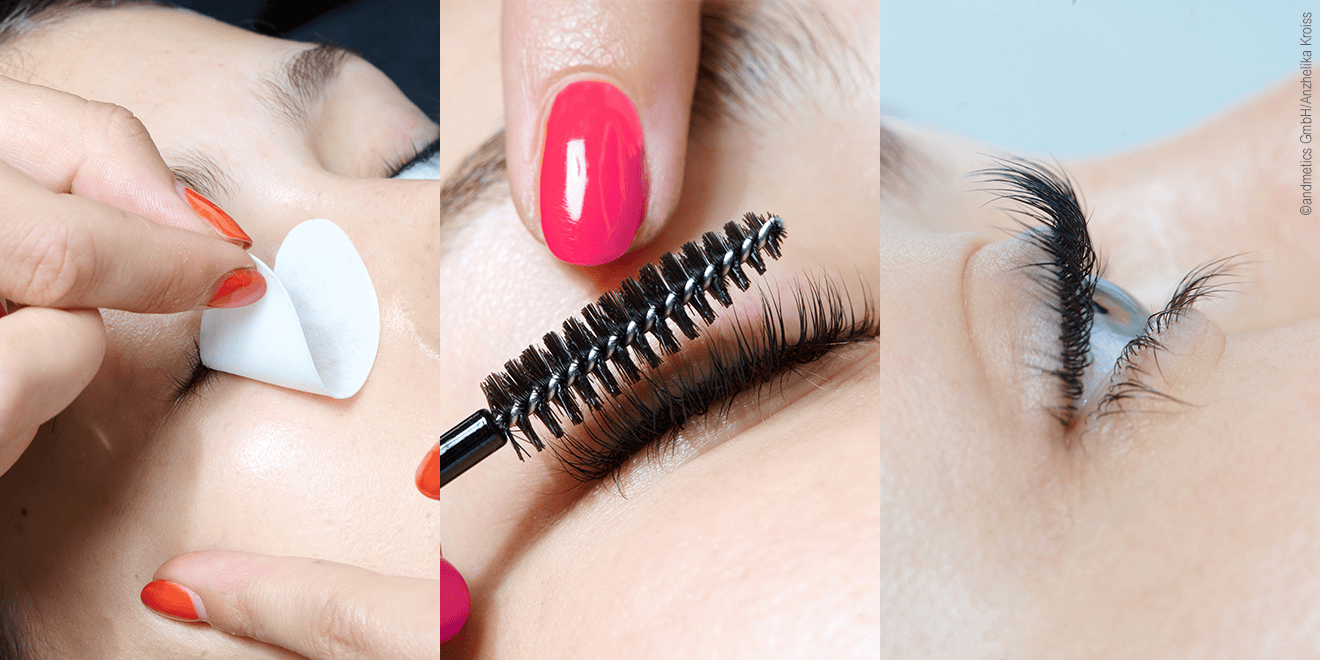
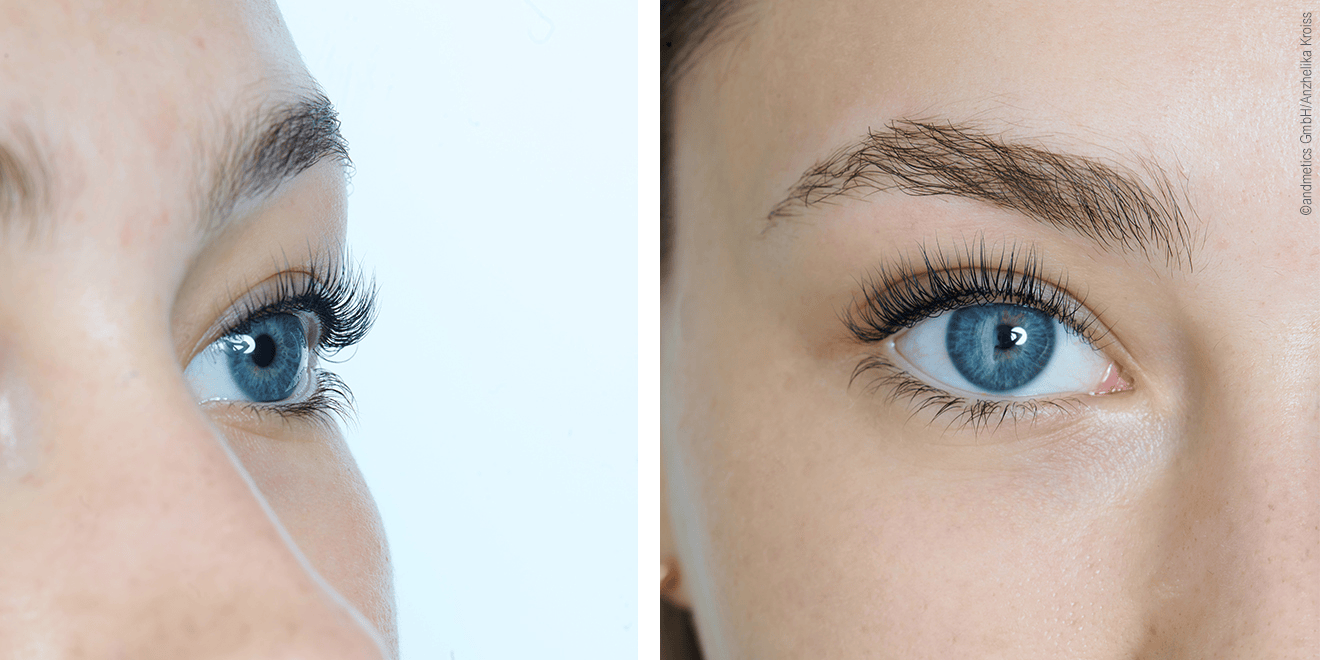
The result
After the lift, the lashes are beautifully curved and the dark colour makes for an even more intense look.