


A healthy, radiant tan all year round? Absolutely – if you know how to apply self tanner the right way! The right product can perfect your complexion, refresh your skin, and give you a real confidence boost.
In this guide, you’ll learn how to achieve a flawless, streak-free tan – without the fear of looking orange.
What Is Self Tanner?
Self tanner, also called sunless tanner, is a safe, skin-friendly way to achieve a bronzed look without harmful UV rays. Its active ingredient, DHA (dihydroxyacetone), reacts with amino acids in the outer skin layer to deliver that coveted golden glow – no sunbathing or tanning beds required.
Choosing the Right Self Tanner for You
Not all self tanners are the same! Different types and formulas cater to specific skin types and desired results.
Gradual Self Tanner:
- Builds color slowly over several applications
- Ideal for beginners or a natural look
- Great for everyday use
- Easier to control and adjust
Downside? You’ll need a bit of patience for the shade to fully develop.
-
 Final Price CHF 24.90300 ml
 -
 Final Price CHF 17.20 Regular Price CHF 22.9525 %375 ml
 -
 Final Price CHF 14.95 Regular Price CHF 19.9525 %50 ml
 -
 Final Price CHF 34.15200 ml
 -
 Final Price CHF 17.20 Regular Price CHF 22.9525 %150 ml




Instant Self Tanner:
- Visible results in just a few hours
- Creates a deeper tan with one application
- Perfect for last-minute events or special occasions
Downside? Must be applied carefully to avoid streaks or patches.
-
 Final Price CHF 18.70 Regular Price CHF 24.9525 %60 ml
 -
 Final Price CHF 18.70 Regular Price CHF 24.9525 %200 ml


Different Types of Self Tanner
- Mist/Spray: Easy to apply, especially for hard-to-reach areas. Dries quickly and evenly.
- Lotion: Great for targeted application, though it requires some practice for a streak-free finish.
- Mousse: Lightweight, spreads easily, dries fast, and delivers an even tan. Perfect for beginners.
- Serum: Especially suited for the face, with a lightweight texture that blends well into daily skincare.
- Oil: Hydrates the skin and provides a subtle, natural glow. Best for overnight use.
The Right Self Tanner for Your Skin Tone
Even more important than choosing between mousse, lotion, or spray is finding the right shade for your skin tone. No one wants an orange self tanner fail!
- Fair skin: Choose “Light” or a gradual self tanner to avoid orange undertones.
- Medium skin: “Medium” to “Dark” shades for a natural, warm tan.
- Deep skin tones: “Dark” or “Ultra Dark” for enhanced radiance and a vibrant glow.

Step-by-Step Guide: How to Apply Self Tanner on the Body
1. Prep Your Skin Before Applying Self Tanner
Just like with makeup, prep is everything. Smooth, well-prepped skin ensures even results and makes your tan last longer.
2. Apply the Self Tanner
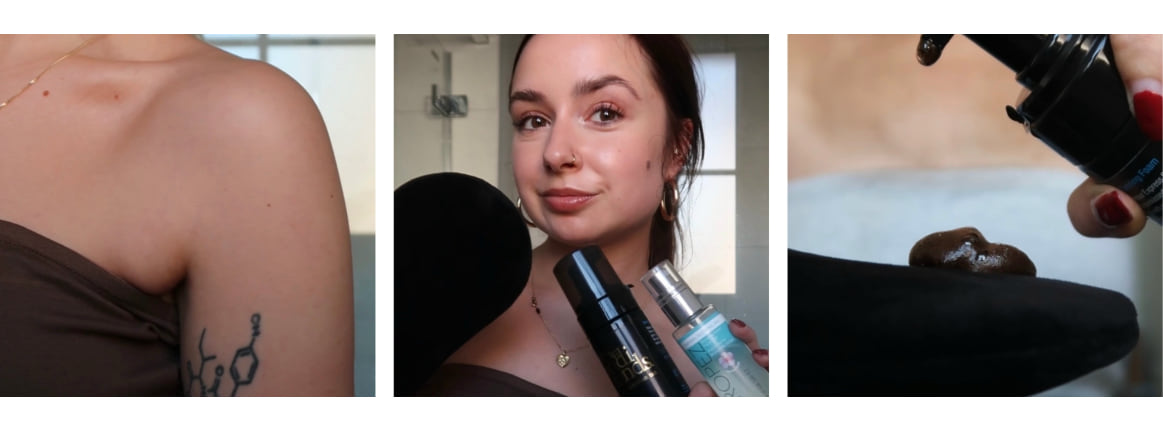
- Use a tanning mitt for even application and to protect your hands.
- Apply in circular motions, working from bottom to top.
- Use an applicator tool for hard-to-reach areas like the back.
3. Let the Self Tanner Develop
Once applied evenly, allow the product to develop. Always follow the instructions on the packaging – each formula differs.
About 3–5 minutes after application, you can carefully put on loose, dark clothing. Save your favorite shirt for later – an old sports tee or oversized pajamas are ideal.
4. Rinse Off & Moisturize
After the recommended time, rinse the self tanner off in the shower. Skip exfoliating cleansers or harsh soaps, as they can strip the color.
Hydration is key! Apply a rich body lotion afterward to keep your skin soft and prolong your tan.
Self Tanner for the Face
Facial skin is more delicate and reacts differently to self tanner. Choose a product designed specifically for the face to avoid irritation.
Application:
- Prep: Cleanse and gently exfoliate to remove dead skin cells.
- Apply: Spread evenly. For a lighter tan, mix with moisturizer. For a deeper look, apply in layers, letting each one dry.
- Develop: Let the product absorb fully before applying makeup or skincare.
- Rinse (if needed): Most face self tanners don’t require rinsing – check the instructions.
-
 Final Price CHF 26.45 Regular Price CHF 37.8530 %15 ml
 -
 Final Price CHF 33.0080 ml
 -

-
 Final Price CHF 18.70 Regular Price CHF 24.9525 %30 ml
 -
Final Price CHF 14.95 Regular Price CHF 19.9525 %50 ml
-
 Final Price CHF 24.90100 ml


Common Questions About Self Tanner
FAQ
How to remove self tanner streaks?
Use a gentle scrub or a cotton pad soaked in lemon juice. A dedicated self tanner remover can also help.
How long does self tanner last?
It starts to fade after 2–3 days and disappears completely within 7–9 days.
Can I combine self tanner with other skincare products?
Yes! Moisturizer is essential to prolong your tan. Just avoid oils or exfoliants, as they can shorten its lifespan.
How can I make my tan last longer?
Hydrate daily with a nourishing lotion once or twice a day to keep your glow even and fresh.
Can I sunbathe after using self tanner?
Yes, but remember: self tanner does not contain SPF. Always apply sunscreen to protect against sunburn and skin damage.